
The Ultimate Cake Pop Recipe You’ll Want to Make Again and Again
Why Everyone Loves Cake Pops
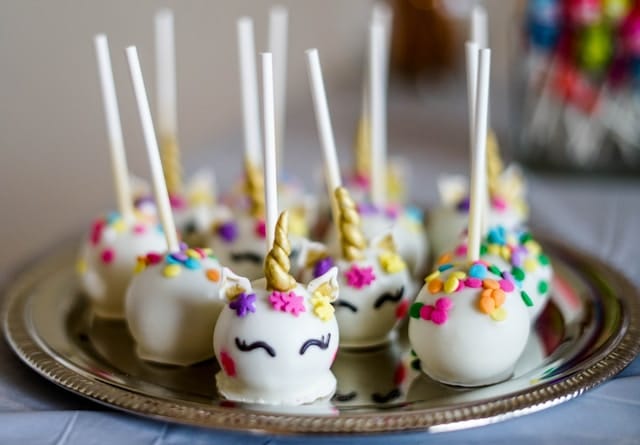
If you’re looking for a treat that’s just as fun to make as it is to eat, this Cake Pop Recipe is your new go-to. Sweet, bite-sized, and full of flavor, cake pops recipes are perfect for parties, holiday tables, or simply satisfying a sugar craving. They combine moist cake, creamy frosting for cake pops, and a crisp candy coating all served on a lollipop stick for extra flair. What’s not to love?
These little desserts are not only adorable but also incredibly customizable. You can use any flavor of boxed cake mix, from classic vanilla to rich chocolate or even red velvet. Pair it with homemade or store-bought frosting and dip it in colorful candy melts for an irresistible finish.
What Makes This Cake Pops Recipe Easy?
This cake pops recipe easy guide walks you through the entire process step-by-step no cake pop maker required. Whether you’re a seasoned baker or just getting started in the kitchen, you’ll find this method simple and fun. All you need is a baked cake, some frosting, and a handful of basic tools. You’ll crumble, mix, roll, dip, and decorate like a pro in no time.


And if you’re a fan of that iconic pink treat, this is the perfect Starbucks cake pop recipe copycat. With the right ingredients and a little technique, you can enjoy the same smooth texture and sweet coating at home for a fraction of the cost.
Benefits of Making Homemade Cake Pops
Cost-Effective and Customizable
Buying cake pops at coffee shops or bakeries can add up quickly, especially for larger events. With this Cake Pop Recipe you can create a full batch (24 pops!) for just a few dollars. Plus, you have full control over flavors, decorations, and ingredients.
Great for Kids and Events
Kids love making and eating cake pops, and this recipe makes a fun hands-on activity for birthday parties, holidays, or bake sales. Adults love them too they’re a hit at weddings, baby showers, and even office celebrations.
Perfect Make-Ahead Dessert
Once dipped and decorated, cake pops store well in the fridge or freezer. That means you can make them ahead of time, saving you stress before an event. They also make cute edible gifts, especially when wrapped individually.
A Fun Twist on Classic Cake Recipes
If you’re someone who loves baking and experimenting with new ideas, you’ll appreciate how this Cake Pop Recipe gives new life to a classic cake. Instead of baking a traditional sheet cake, you turn it into playful bites with a smooth candy shell.
Whether you’re recreating a beloved Starbucks Cake Pop Recipe or testing your own flavor pairings, this recipe gives you endless creative freedom. Don’t be afraid to add crushed cookies, chopped nuts, or even a dash of flavored extract to make your batch extra special.
Easy Cake Pop Recipe
Description
Looking for a fun and easy cake pop recipe that’s perfect for birthdays, holidays, or any sweet occasion? This beginner-friendly recipe uses simple boxed cake mix and homemade (or store-bought) frosting to create soft, delicious cake balls coated in colorful candy melts. No advanced baking skills needed just chill, dip, and decorate. Whether you're hosting a party or need a fun treat for kids, this cake pop recipe delivers big flavor in a bite-sized form.
Ingredients
For the Cake
For the Frosting:
For Coating & Decoration
Instructions
Bake the Cake
Preheat your oven (usually 350°F / 175°C — check your cake mix box).
Make the cake following the instructions on the box.
Let it cool completely (about 1 hour).
Make the Frosting (Skip this if using ready-made)
Beat the soft butter until creamy.
Slowly add powdered sugar, then add milk and vanilla.
Mix until smooth and easy to spread.
Crumble the Cake
Once the cake is cool, break it into fine crumbs in a large bowl.
Add 1/3 to 1/2 cup of frosting.
Mix with your hands or a spoon until it sticks together like dough.
(It should be moist, not too sticky.)
Shape the Cake Balls
Roll into small balls (about 1 inch wide).
Place on a tray lined with baking paper.
Chill in the fridge for 1–2 hours, or freeze for 30 minutes.
Add the Sticks
Melt a small bit of candy melts.
Dip the tip of each stick into the melted candy, then push it halfway into each ball.
(This helps keep the stick in place when dipping.)
Dip and Decorate
Melt the rest of the candy melts in the microwave (30 seconds at a time) until smooth.
Dip each cake pop into the melted candy.
Gently tap to remove extra coating.
Add sprinkles or decorations right away before it dries.
Place them upright in foam or a stand.
Let Them Set
Let the coating dry at room temperature for 15–20 minutes.
Or chill in the fridge to set faster.
Nutrition Facts
Servings 24
- Amount Per Serving
- Calories 160kcal
- % Daily Value *
- Total Fat 7g11%
- Saturated Fat 3.5g18%
- Cholesterol 20mg7%
- Sodium 115mg5%
- Total Carbohydrate 23g8%
- Dietary Fiber 1g4%
- Sugars 16g
- Protein 1.5g3%
- Calcium 20 mg
- Iron 0.5 mg
* Percent Daily Values are based on a 2,000 calorie diet. Your daily value may be higher or lower depending on your calorie needs.
Note
- Chill Before Dipping: Always chill the cake balls before coating to help them stay firm and avoid falling off the sticks.
- Don’t Over-Frost: Add frosting gradually—too much makes them mushy and hard to shape.
- Smooth Coating: Thin candy melts with a bit of vegetable shortening or coconut oil if they’re too thick.
- Use a Styrofoam Block: It’s perfect for holding cake pops upright while the coating sets.
- Flavor Twist: Try different cake and frosting combinations like chocolate + cream cheese or red velvet + vanilla.
- Storage: Store cake pops in an airtight container in the fridge for up to 5 days or freeze uncoated pops for up to 1 month.